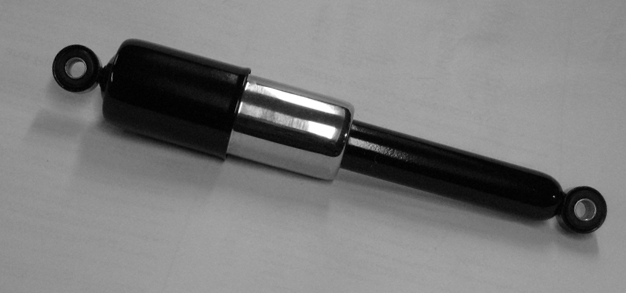
For Vol.1 Mac starts with "How to disassemble the ********************************************************************** It's easier than you think to clean up and paint your
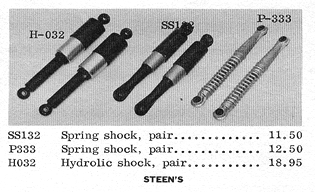
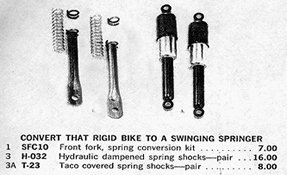
Figure A First, a little history on Steen's Catalogs and Steen's used three different style shocks on their
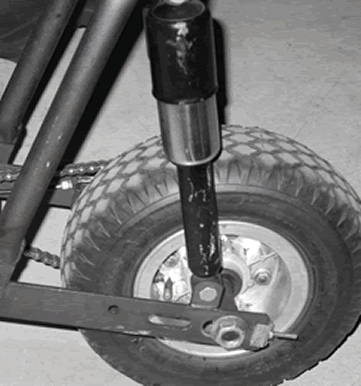
Steen's starts offering the Ceriani shocks in their catalog in 1963. They actually carried the Ceriani shocks longer in their catalog than their own Steen's cast aluminum shocks. One error in all of the catalogs was the description that the shocks were hydraulic. This is not the case as you will see later.
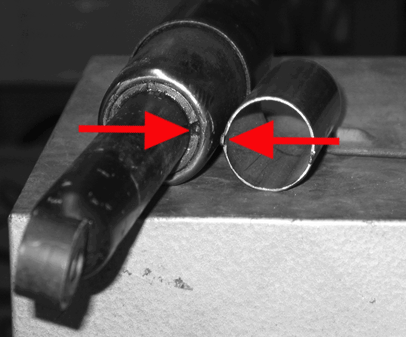
The piece of pipe on the right is Mac's tool. It is 13/8" OD with two 1/8" notches sticking up about 1/8" that will line up with the notches under the bottom cup. (See figure B) The ID is 11/4". This tool is used to hold on to the shock while allowing you to unscrew the bottom part of the shock.
Figure B
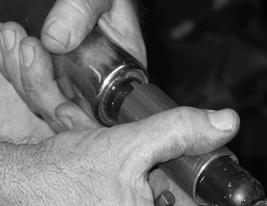
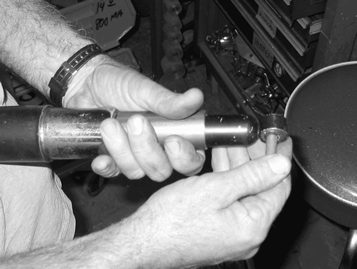
Mac slides the 13/8" pipe over the bottom part of the shock lining it up with the notches under the bottom cup.(See figure C)
Figure C With a long bolt or screwdriver inserted into the bolt hole of the bottom of the shock so you can get a good grip on it. Turn the bolt or screwdriver counter clockwise (Viewing from the bottom) while holding the special tool firmly.
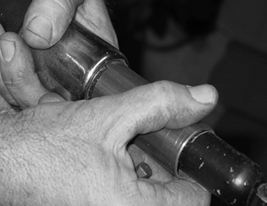
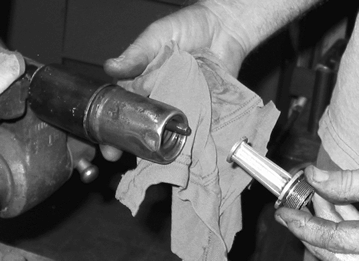
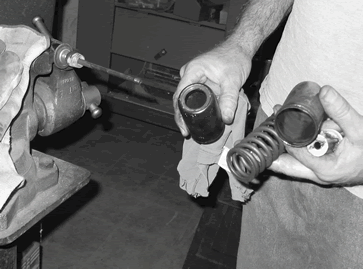
Figure D After you loosen the bottom part of the shock you can then unscrew it by hand. (See figure E)
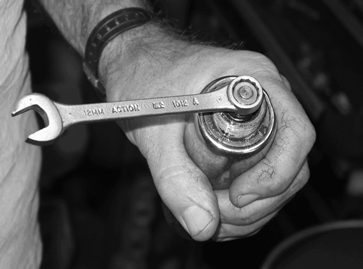
Figure E When you remove the bottom part of the shock a 12mm nut is exposed to put a wrench on. (See figure F)
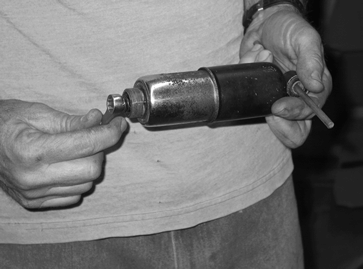
Figure F Now take a long bolt or a screwdriver inserted into the top bolt hole of the shock so you can get a good grip on it. Hold on to the bolt or the screwdriver and unscrew the 12mm nut being careful not to lose the nut or tension spring once it is loosened and removed.(See figure G)
Figure G After you remove the tension spring remove the aluminum guide is next. Be careful when removing the aluminum guide, it should just slide off but sometimes the aluminum guide can get stuck on the threads of the top mounting stem. If this happens just start unscrewing the aluminum guide and it will come off. (See figure H)
Figure H After you remove the aluminum guide the rest of the shock will come apart. (See figure I)
Figure I
1. Top mounting stem 2. Rubber bumper stop 3. Top cup 4. Main shock spring 5. Seal 6. Bottom cup 7. Aluminum guide 8. Tension spring 9. 12MM nut 10. Bottom of shock
When you're done cleaning and painting the shock it should look like it's brand new. If you have any questions,or looking for parts, feel free to email Mac at: mrminibike@aol.com |